Loading…
←Back to Newsletters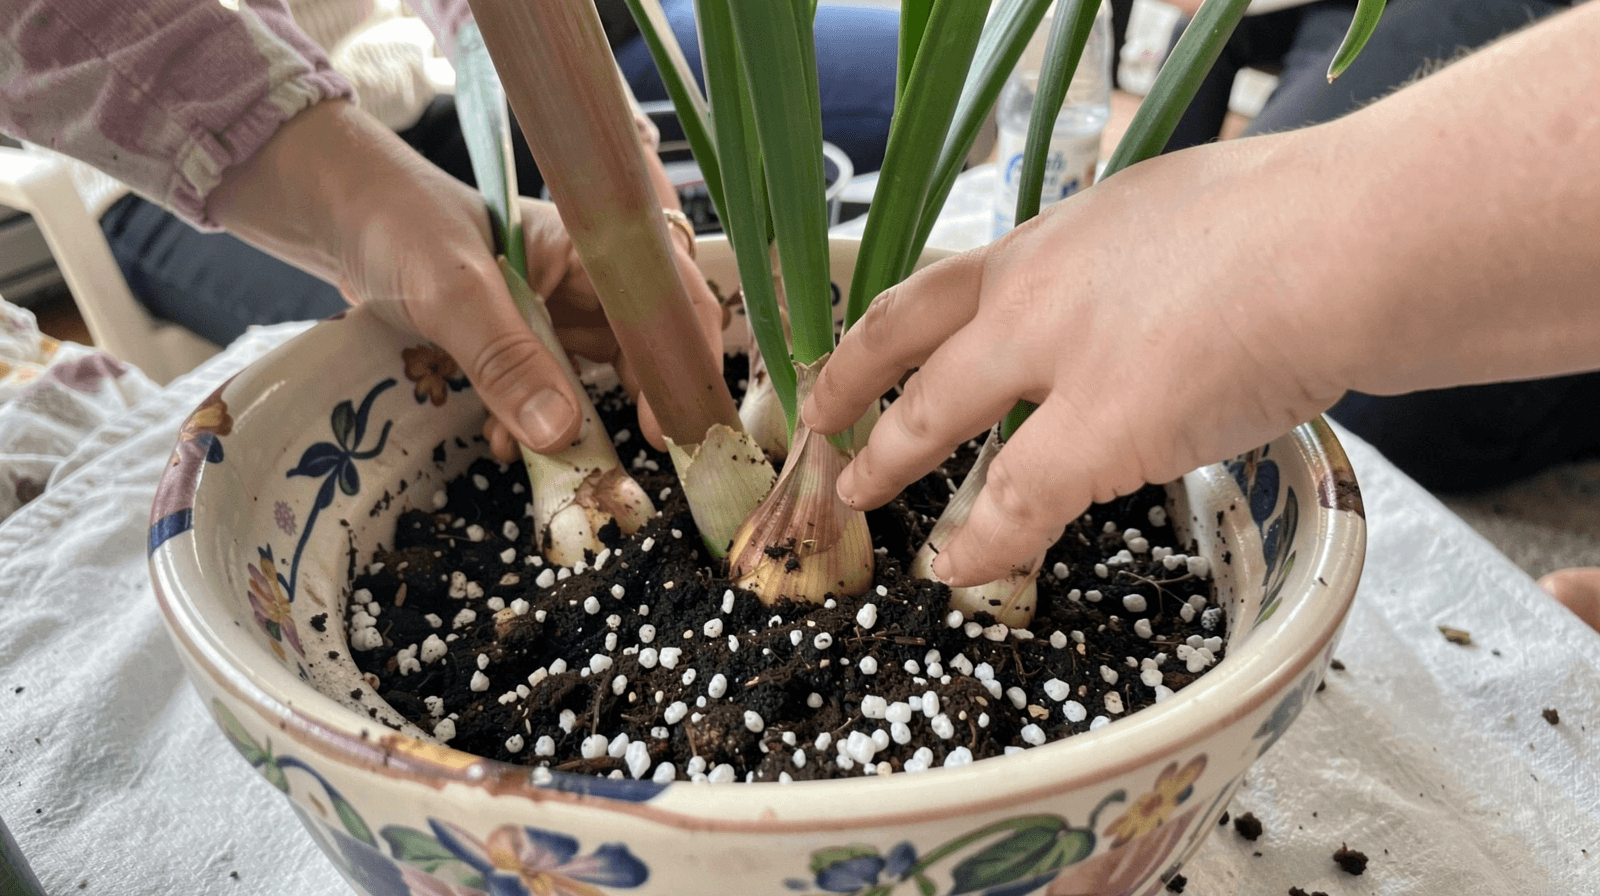

How I Force My Garden's Favorite Winter Blooms Every Year
Written by David Rodgers — 2026-11-03
A step-by-step guide to coaxing dramatic color from your bulbs.
The newsletter for backyard growers tired of buying seasonal decor that disappoints.
BulbsSeasonal DecorContainer GardeningWinter Blooms
The problem: Why does my indoor bloom look sad or die early?
I’ve seen so many folks bring home a beautiful Amaryllis bulb, put it in a pot of dirt, and then get frustrated when the leaves turn yellow or the flower just never shows up—or worse, the whole thing turns into mush. Usually, there are two culprits here: impatience and over-watering. Most people treat an indoor forced bloom like a standard houseplant that needs a drink every day. But Amaryllis bulbs aren't typical houseplants; they are "lazy" plants that need to be tricked into thinking it’s springtime inside your living room.
When you see those leaves drooping or turning a sickly yellow, it’s often because the bulb is literally drowning in water before it has even had a chance to grow its root system properly. Or, on the flip side, if nothing happens at all after three weeks, the bulb might still be "asleep." I learned this early on in my own backyard and indoor setups: you can't force nature to skip the prep work. If you don't respect the dormancy period or manage the moisture correctly during that first big growth spurt, the plant will just give up. It’s not a "bad bulb"—it’s usually a breakdown in the timing of its internal clock.
Part 1: Letting them rest (Dormancy is key)
The biggest mistake I see people make—and one I made myself years ago when I was first trying to get consistent results—is rushing the process. An Amaryllis bulb isn't ready to grow just because you bought it at a nursery in December. It needs a period of "rest" or dormancy. Think of it like this: if you tried to run a marathon without sleeping for three days, your body would shut down. The bulb is the same way.
Before you see any green poking out of that top, the bulb needs to sit in a cool, dry place. In my experience, keeping them in a room that stays around 60–70°F (15–21°C) for several weeks allows the internal chemistry of the bulb to shift from "storage mode" to "growth mode." If you put it straight into a warm, sunny window immediately, the plant gets confused. It tries to grow too fast, exhausts its energy reserves, and ends up with stunted leaves or no flower at all. You have to let it sit still first. Only when you notice those first little green tips starting to emerge is it time to move it into its "active" phase.
Part 2: Potting or just water? The two paths to bloom
There are really two ways to handle these bulbs indoors, and which one you choose depends on how much fuss you want to deal with. I’ve tried both extensively in my own home, and each has its pros and cons.
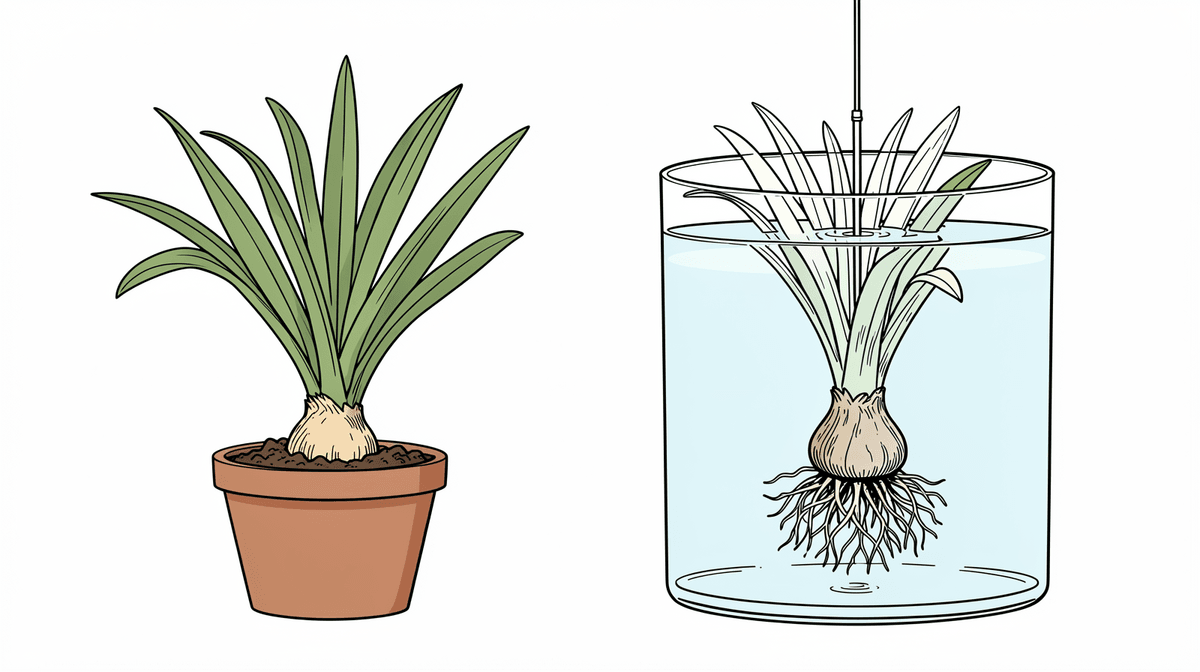
The first path is the traditional potting method. You put the bulb in a container with high-quality potting mix. This provides stability; once the roots are established, they have plenty of "anchorage" to hold up that heavy flower head. It feels more like gardening, but it carries the risk of over-watering if you aren't careful about drainage.
The second path is the hydroponic or "water only" method. This involves placing the bulb in a container where it sits in water (or a very wet medium) without traditional soil. This can be faster and much cleaner—no dirt on your coffee table! However, it’s trickier to get right because you have to balance the water level perfectly. If it's too deep, the bulb rots; if it's too shallow, the roots dry out. For most of my neighbors who want a "set it and forget it" experience for a few weeks, I usually recommend the soil method because it’s much more forgiving of small mistakes in watering frequency.
The critical care protocol: Light, temperature, and the perfect soak
Once those green shoots are pushing up, you have to be very intentional about three things: light, heat, and moisture. This is where most people lose their bloom.
First, light. Amaryllis bulbs need a lot of it—more than your average ivy or fern. They want "full sun" logic. If they aren't getting at least six hours of bright light, the stem will stay short and the flower will be tiny. A south-facing window is usually the gold standard here.
Second, temperature. You want a warm environment—around 70°F (21°C)—during the growth phase. This mimics the warming soil of early spring. If it’s too cold, the growth stalls; if it’s too hot without enough light, the plant will "bolt" and produce weak leaves.
Third, the soak. Instead of a little bit of water every day (which is a recipe for root rot), you want to aim for a deep soak followed by a dry-down period. You want the soil to feel moist like a wrung-out sponge, but never swampy or muddy. I always tell people: if the soil feels wet to the touch between waterings, you're doing too much.
Step-by-step potting guide for maximum drama (Using a soil mix)
If you want those big, dramatic blooms that actually stand up straight without drooping, using a soil mix is your best bet. Here is how I do it in my own home to get the best results:
- The Mix: Don't just use heavy garden soil; it’s too dense for an indoor pot. Use a high-quality potting mix amended with perlite or coarse sand (about 25% of the total mix). This ensures that air can reach the roots.
- The Pot: Choose a container only slightly larger than the bulb itself. If the pot is too huge, all that extra soil will stay wet for too long and rot your bulb. Ensure it has a large drainage hole at the bottom.
- Planting Depth: Place the bulb in the pot so that about two-thirds of it is covered. You don't want it sitting on the surface, but you also don't want to bury it completely—it needs some "breathing room" at the top.
- Initial Watering: Give it a good soak immediately after planting until water runs out the bottom, then move it to its light source.
- The Schedule: During the first few weeks of growth, water every 3–4 days depending on how dry your house is. Once the flower starts to form, you can scale back slightly as the plant begins to use up more water for the bloom itself.
What to do when things go wrong: The three most common mistakes
Gardening isn't always a straight line of success; sometimes things go sideways. When they do, here is how I troubleshoot the three biggest issues I see with forced Amaryllis:
1. The "Mushy" Bulb (Root Rot)
If you pull the bulb out and it feels soft or smells like sulfur, it’s over-watered. You can't really save a rotten bulb, but to prevent it next time, check your drainage. Make sure your pot isn't sitting in a saucer of standing water. The "drainage hole" must actually be draining!
2. Yellowing Leaves with No Flower
This is usually a light issue or a nutrient deficiency. If the leaves are big and green but no bud appears, move it to a brighter spot—or consider adding a balanced liquid houseplant fertilizer once every two weeks during the growth phase. Amaryllis are "heavy feeders" when they are trying to produce flowers.
3. The "Floppy" Stem
If the flower head is drooping over the side of the pot, it’s often because the bulb was planted too shallowly or didn't have enough soil weight to anchor it. Next time, make sure that two-thirds rule is strictly followed and use a slightly heavier potting mix.
When should you start this process? Zone notes for success
Even though we are talking about indoor "forcing," your local climate still plays a role in when you buy and how the bulbs react to your home's humidity. While Amaryllis are generally hardy, they thrive best in environments that mimic their native ranges (often seen in USDA Zones 9–11). If you live in a very dry climate (like Zone 7 or higher), you might find yourself needing to mist the leaves occasionally to keep them from looking crispy.
Timing is everything. You want to start your "dormancy" phase in late autumn—think November or early December. This gives the bulb enough time to rest and then grow its bloom just as the holiday season hits.
| Factor | Target Condition | Why it matters |
|---|---|---|
| Dormancy Temp | 60°F – 70°F | Triggers internal "wake up" cycle |
| Growth Light | 6+ hours direct/bright | Builds the stem and flower size |
| Watering Style | Soak & Dry | Prevents rot while hydrating roots |
| Soil Type | Well-draining mix | Ensures oxygen reaches the bulb |
By following this timeline—resting first, then feeding with light and water—you'll move past the "guessing" phase and start seeing those dramatic blooms every year.
Your turn
Are you ready for winter blooms? Tell me what your favorite seasonal flower is in the comments! Share this issue with someone who loves holiday flowers.
🌿 Get Seasonal Gardening Tips
New guides, planting reminders, and growing tips — straight to your inbox.
No spam. Unsubscribe anytime.
About the Author
David Rodgers is the Founder & Head Gardener of Planting Atlas. With over 40 years of hands-on gardening experience in Oklahoma's Zone 7 climate, he researches, writes, and personally tests every guide on the site.
David draws from real backyard trials, soil testing, and trusted sources like Oklahoma State University Extension and USDA data to deliver practical, zone-specific advice that actually works.
Read more about David and Planting Atlas →