Rain Garden
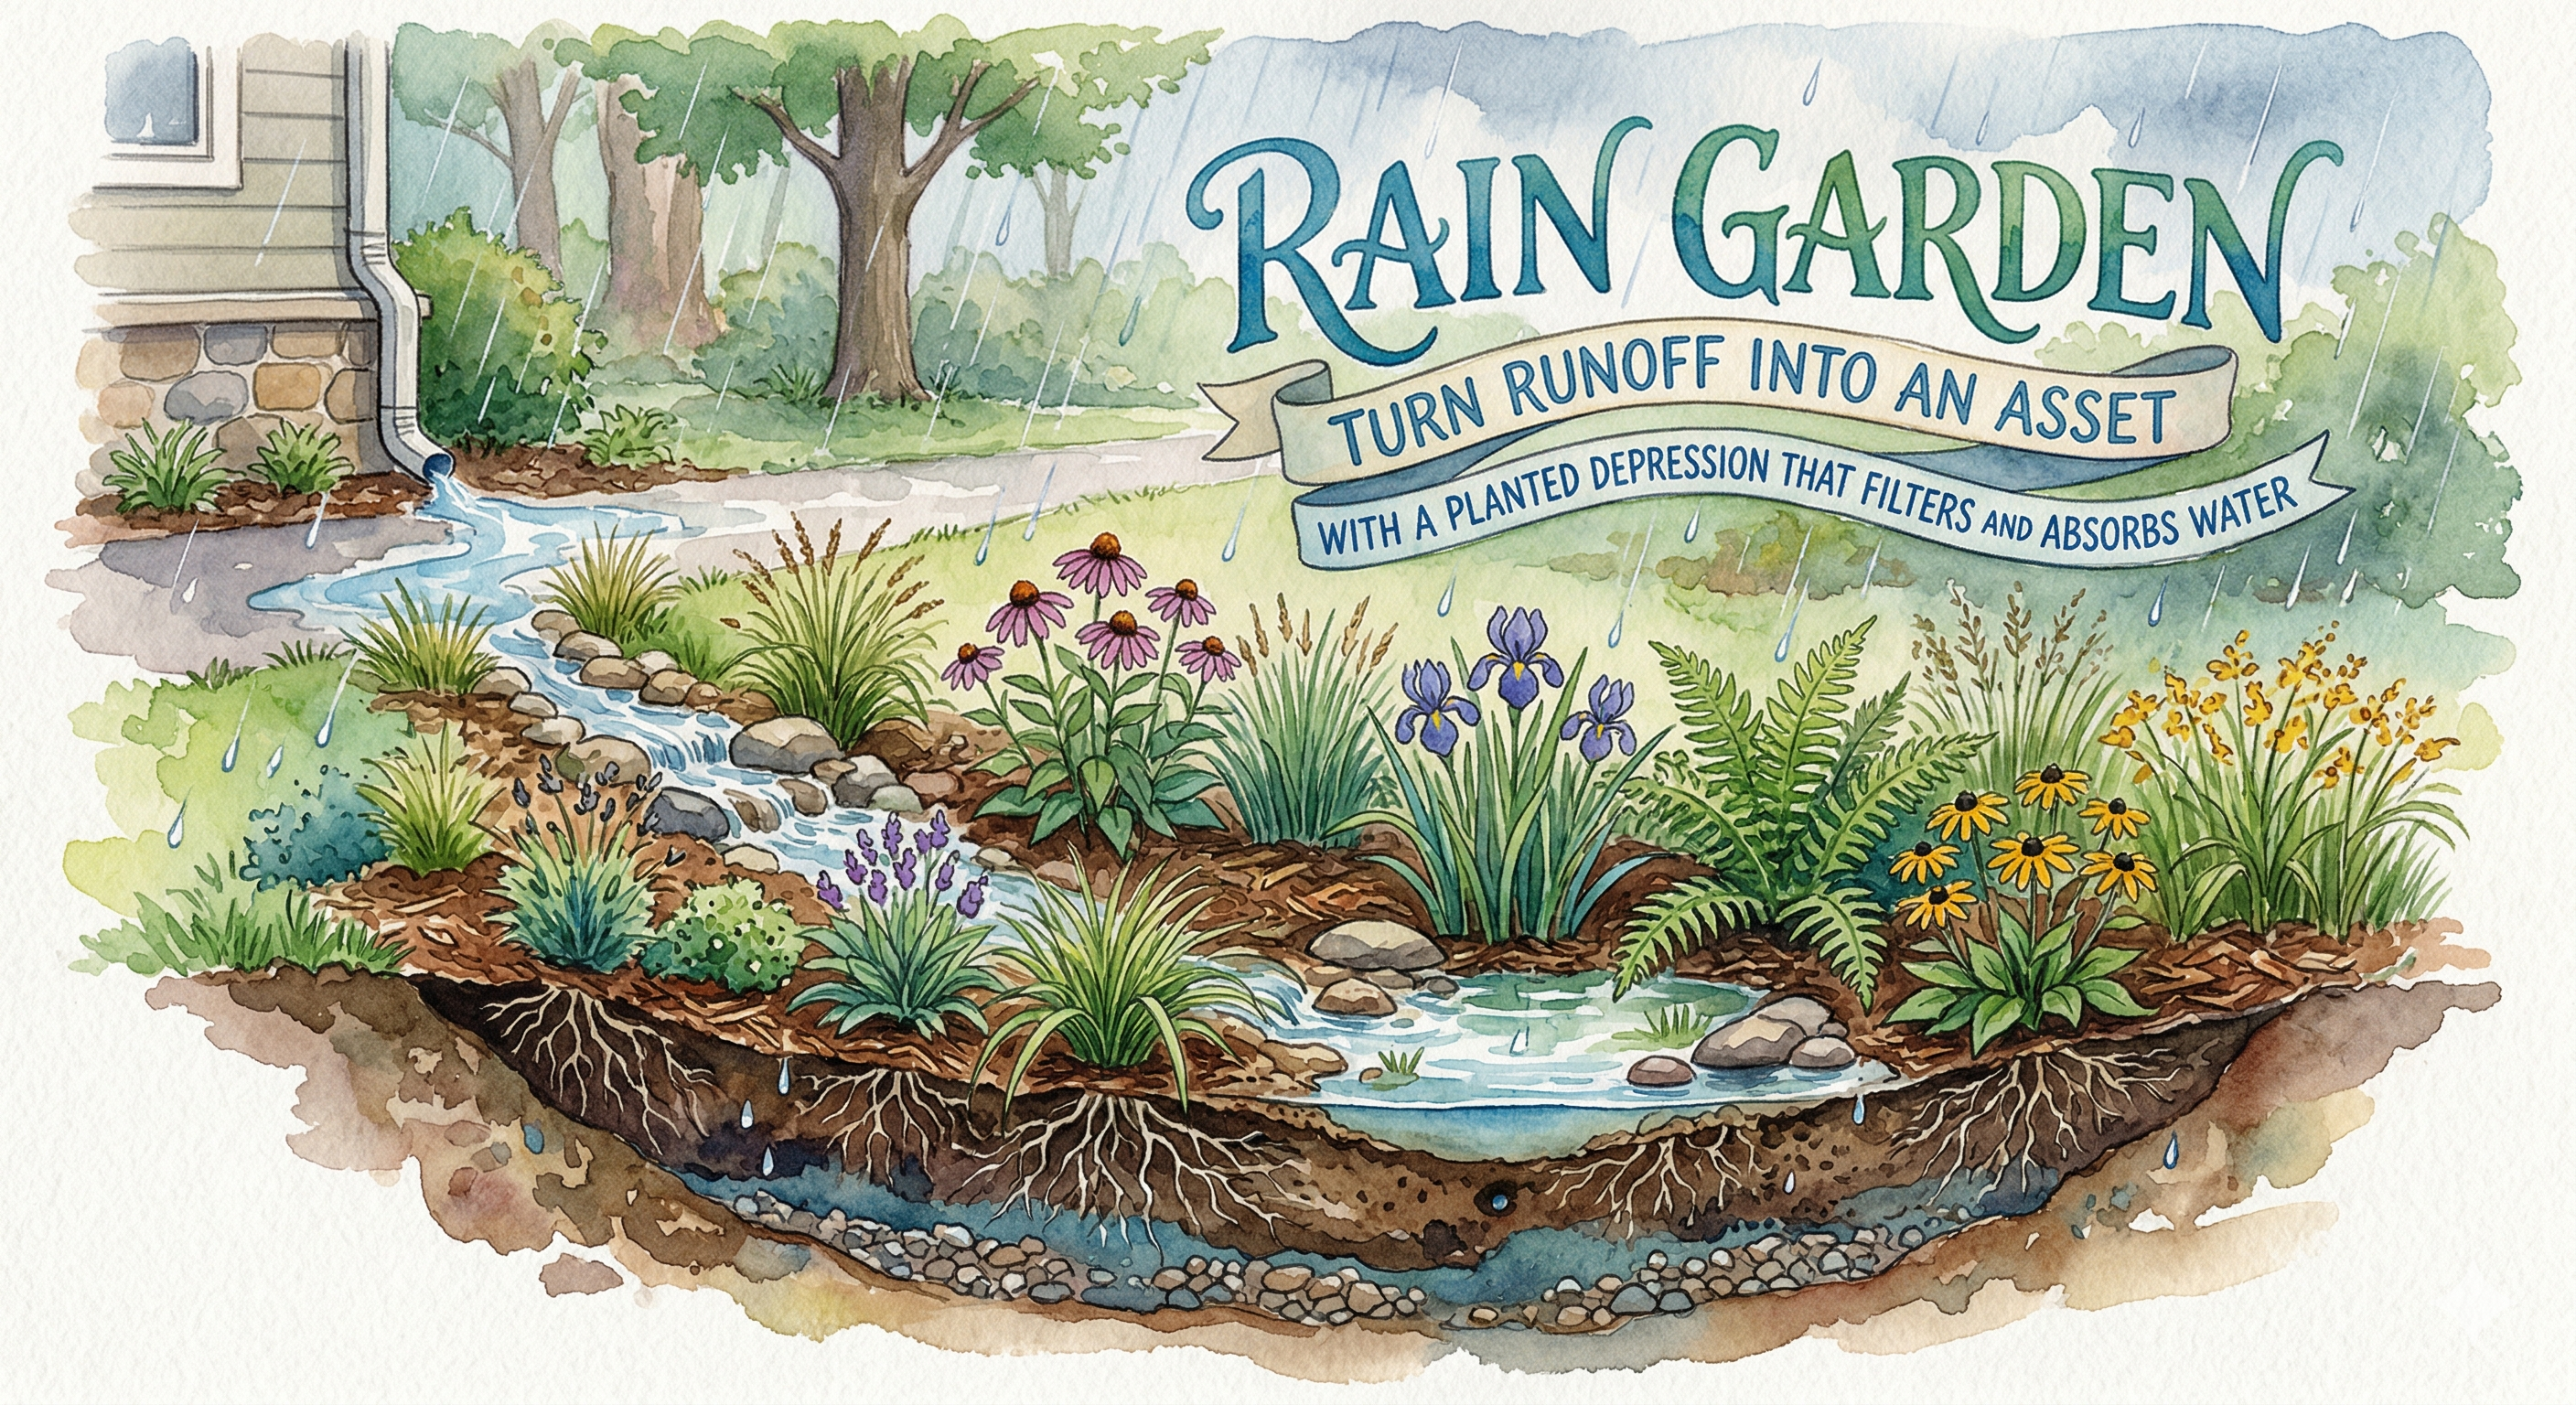
Turn Runoff Into an Asset — A Planted Depression That Filters, Absorbs, and Beautifies
Every time it rains, water that once soaked into the ground now rushes off rooftops, driveways, and compacted lawns — carrying pollutants into storm drains, streams, and groundwater. A rain garden intercepts that runoff, holds it in a shallow planted depression, and allows it to slowly infiltrate into the soil — cleaning it, recharging groundwater, and transforming a landscape liability into one of the most ecologically productive features a homeowner can build. This guide shows you how to design, build, plant, and connect a rain garden anywhere in America — from concept through long-term care.
Section 1: What Is a Rain Garden?
A rain garden is a shallow, planted depression — typically 4 to 8 inches deep — designed to collect and temporarily hold stormwater runoff from impervious surfaces like rooftops, driveways, patios, and compacted lawns. Unlike a pond, which holds water permanently, a properly designed rain garden drains within 24 to 48 hours after a storm — it is not a standing-water feature and does not create mosquito habitat.
The planted depression is filled with specially prepared soil that drains faster than native soil, and planted with deep-rooted native plants whose extensive root systems create channels for water infiltration, take up water through transpiration, and filter contaminants as water percolates through the root zone. The result is a landscaping feature that is simultaneously functional, ecologically valuable, and — when well-planted — genuinely beautiful.
Rain gardens have been studied and promoted by watershed scientists, cooperative extension services, and environmental agencies across the United States for decades. The research is consistent: a properly sited and sized rain garden can capture and infiltrate 30 to 40 percent more water than a conventional lawn of the same size. When deployed across a neighborhood or watershed at scale, rain gardens dramatically reduce flooding, stream bank erosion, and nonpoint source pollution.
The Stormwater Problem Rain Gardens Solve
| The Problem | What Happens | U.S. Scale | Rain Garden Solution |
|---|---|---|---|
| Increased runoff volume | Impervious surfaces shed 50–95% of rainfall as surface runoff rather than allowing infiltration; natural landscapes absorb 50–70% | The average home generates 3,000–5,000 gallons of runoff from a single inch of rain on its roof | A properly sized rain garden captures and infiltrates the runoff from 1–1.5 inches of rain from its contributing drainage area |
| Water quality degradation | Runoff picks up fertilizers, pesticides, pet waste, oil, heavy metals, and sediment; all flow untreated into storm drains and directly to waterways | Nonpoint source pollution from stormwater is the leading cause of water quality impairment in U.S. rivers, lakes, and coastal waters (EPA) | Rain garden plants and soils filter up to 80% of nitrogen, 70% of phosphorus, and significant percentages of heavy metals and bacteria |
| Stream channel damage | Higher runoff volumes cause streams to run higher and faster after each storm, eroding banks, destroying habitat, and destabilizing channels | More than half of U.S. stream miles are assessed as impaired; urban stormwater is a major contributing factor across all regions | Slowing and infiltrating runoff reduces peak flows that cause channel erosion; a neighborhood of rain gardens measurably improves downstream stream health |
| Groundwater depletion | Surface runoff channeled away never recharges aquifers; in regions dependent on groundwater, development accelerates overdraft | Aquifer levels are declining across the Great Plains, Southwest, and Southeast | Infiltrating stormwater recharges local groundwater, supporting baseflow in streams and replenishing wells in rural and suburban areas |
| Flooding and basement issues | Concentrated surface runoff causes local flooding, overwhelms storm sewer capacity, and increases basement water problems | Billion-dollar flood events have become annual occurrences in many American cities | Capturing and infiltrating runoff close to where it falls reduces downstream accumulation and peak storm sewer loading |
What Makes a Rain Garden Different from Other Features
| Feature | How It Works | Drains? | Planted? | Filters Water? | Best For |
|---|---|---|---|---|---|
| Rain Garden | Shallow planted depression with amended soil; temporarily holds and infiltrates stormwater | Yes — 24–48 hrs | Yes — natives preferred | Yes — soil and roots | Residential and commercial runoff capture; any lot size |
| Retention Pond | Permanent pool holds water long-term; some infiltration around edges | No — permanent water | Optional | Some — sedimentation | Large-scale stormwater for subdivisions; not typical for individual yards |
| Detention Basin | Holds water temporarily then releases slowly through a drain outlet; does not infiltrate | Yes — outlet | Sometimes | Minimal | Large-scale volume control; typically public infrastructure |
| Bioswale | Linear channel; designed for conveying and infiltrating water along a flow path | Yes — infiltration and overflow | Yes | Yes | Linear drainage areas; roadside strips; connecting features to rain gardens |
| French Drain | Underground perforated pipe in gravel trench; moves water to another location; does not infiltrate on-site | Yes — relocates water | No | No | Moving water away from foundations; not a stormwater quality solution |
| Dry Creek Bed | Decorative gravel channel; conveys water aesthetically; can be combined with rain gardens as inlet feature | Partially | Optional | Minimal | Aesthetic water conveyance; often used as a feeding element for a rain garden |
| Rain Barrel / Cistern | Captures roof runoff for later use; storage-based solution | Release controlled | No | No | Water conservation; best combined with rain garden for overflow management |
Incentives and Rebates Across America: Many cities, counties, water utilities, and state agencies offer financial incentives for installing rain gardens — including rebates ($50–500+), stormwater utility bill credits, free native plants, free soil testing, and design assistance. Search "[your city/county] rain garden rebate" or "[your state] stormwater incentive program." States with particularly robust programs include Maryland, Virginia, Minnesota, Wisconsin, Pennsylvania, and Oregon.
Section 2: Siting and Sizing
The single most important decision in rain garden design is where you put it. Location determines whether the garden receives runoff effectively, drains properly, avoids potential harm to structures, and integrates gracefully into your landscape. Spend more time on siting than on any other planning step — a poorly located rain garden is at best ineffective and at worst damaging.
The Non-Negotiable Siting Rules
| Rule | Minimum Distance / Requirement | Why It Matters |
|---|---|---|
| Distance from house foundation | Minimum 10 feet; 15–25 feet recommended | Water infiltrating near your foundation can migrate into a basement or crawlspace; the most critical safety rule |
| Distance from septic system | Minimum 25 feet from septic tank; 50–100 feet from drain field | Saturating soil near a septic system can cause system failure; check local codes as requirements vary by state and county |
| Distance from well | Minimum 50–100 feet from drinking water well | Protects drinking water from potential contaminants in stormwater; check local well setback requirements |
| Distance from buried utilities | Minimum 5 feet from any buried utility line; call 811 before excavating | Digging into utility lines is dangerous and expensive; 811 is free and legally required in most states before any excavation |
| Distance from property line | Minimum 2–5 feet from property line; check local codes | Prevents runoff from being directed onto neighboring property |
| Slope of site | Best: gentle natural slope of 2–12% leading water to the garden | Steeper slopes create faster, more erosive water flow; may require terracing or a bioswale inlet to convey water safely |
| Soil drainage | Soil must drain at least 0.5 inches per hour; always test before building | Clay soils that drain too slowly create standing water longer than 48 hours, causing plant death and mosquito problems |
| Flood plain / wetland | Do not build in FEMA-designated flood plains or regulated wetlands without permits | May be prohibited, and can expose rain gardens to overwhelming flood volumes they are not designed to handle |
| Overhead utilities | Keep large trees at least 20 feet from overhead power lines | Large trees near power lines require frequent trimming or pose safety hazards; choose appropriately sized plants near utilities |
Finding the Best Location on Your Property
- •Observe your yard during or after heavy rain: Watch where water flows, where it pools, and what path it takes. This natural drainage pattern tells you where a rain garden will receive water most easily.
- •Identify your primary contributing drainage area: What surfaces drain to the location you're considering? A roof downspout, a section of driveway, a sloped lawn area, or a combination? Knowing the contributing area is essential for sizing.
- •Look for natural low spots: Existing depressions, areas where grass stays green longer after rain, or spots where water puddles briefly after a storm are natural candidates — they already receive runoff and may only need modest reshaping.
- •Consider visibility and aesthetics: A well-planted rain garden is a garden feature worth showcasing. Front yard placement near a downspout is increasingly popular — it demonstrates environmental responsibility visibly and adds curb appeal.
- •Check sun exposure: Most rain garden plants prefer full sun (6+ hours). Shaded locations under trees limit your plant palette and may slow infiltration due to root competition.
- •Consider overflow: Every rain garden needs an overflow path for storms that exceed its capacity. Identify where overflow would naturally flow and ensure it will not cause erosion or flood neighboring properties.
How to Size Your Rain Garden
Sizing a rain garden correctly is the most technical part of the design process — but it doesn't require an engineering degree. The goal is to size the rain garden so that it can hold and infiltrate the runoff from a 1-inch design storm from its contributing drainage area within 24–48 hours.
Step 1: Calculate Your Drainage Area
- •Roof area: Measure the footprint of the roof section draining to the relevant downspout (typically 500–1,500 sq ft per downspout)
- •Driveway/patio: Measure the full impervious surface area that slopes toward the garden location
- •Lawn area: Measure any lawn sections that slope into the proposed area; multiply by 0.3 (lawns shed only about 30% of rainfall as runoff)
- •Add these together for your total contributing drainage area in square feet
Step 2: Determine Your Soil Infiltration Rate
| Soil Type | Infiltration Rate | Description | Sizing Factor | Amendment Needed? |
|---|---|---|---|---|
| Sandy / Gravelly | 1.0–3.0+ in/hr | Gritty texture; drains within minutes to hours; does not clump; common in coastal plains, river valleys, and arid West | 20–25% of drainage area | Add organic matter to improve water retention and filtration capacity |
| Sandy Loam | 0.5–1.0 in/hr | Good all-around soil; crumbles easily; ideal for rain gardens | 25–30% of drainage area | Minimal — add compost for plant establishment |
| Loam / Silt Loam | 0.3–0.5 in/hr | Balanced mineral mix; moderate drainage; common across Midwest and Mid-Atlantic | 30–35% of drainage area | Moderate — adding 30–40% coarse sand improves drainage; or use rain garden mix in excavated area |
| Clay Loam | 0.1–0.3 in/hr | Significant clay content; the most common home garden soil type | 35–45% of drainage area | Yes — excavate 18–24 inches and backfill with rain garden soil mix |
| Clay (heavy) | Below 0.1 in/hr | Sticky, plastic when wet; cracks when dry; very slow drainage; common in Southeast, Midwest, and coastal areas | 45–60% or engineered underdrain | Required — excavate 24–36 inches; backfill with amended mix; may need perforated underdrain pipe |
Step 3 — The Sizing Formula: Rain Garden Area (sq ft) = Contributing Drainage Area (sq ft) × Sizing Factor. Example: 1,000 sq ft roof with loam soil (factor 0.30) = 300 sq ft rain garden. Example: 800 sq ft driveway with clay loam soil (factor 0.40) = 320 sq ft rain garden.
The Critical Soil Infiltration Test
- •Dig a 12-inch deep hole at your proposed location
- •Fill the hole completely with water and let it drain fully — this pre-saturates the soil to simulate conditions after a prolonged rain
- •Fill the hole again to 12 inches; mark the water surface level
- •After 1 hour, measure how much the water level has dropped. A drop of 0.5 inches or more indicates suitable soil.
- •If less than 0.5 in/hr: excavate and backfill with amended rain garden soil mix, or install an underdrain system
- •If more than 6 in/hr (very sandy): add organic matter to slow infiltration and improve filtration capacity
Know Before You Dig — Call 811: Before any excavation, call 811 (the national "Call Before You Dig" number) or visit 811.com. This is free and legally required in most states. Utility companies will mark buried electrical, gas, water, sewer, and telecommunications lines within a few business days. Digging into an unmarked utility line is extremely dangerous. Always call first.
Section 3: Design and Construction
Rain garden construction follows a logical sequence: design the shape and cross-section, excavate the bowl, build the berm, prepare and install the soil, create an overflow structure, and install plants. Each step is achievable by a homeowner with basic tools over a weekend, though larger gardens or those in challenging soils may benefit from professional assistance.
Anatomy of a Rain Garden
| Component | Description | Key Detail |
|---|---|---|
| Inlet area | The upslope edge or point where water enters the garden — a simple opening in the berm, a splash pad of river rock, or a constructed inlet channel | Must slow incoming water to prevent erosion; use rocks, river gravel, or dense vegetation at the point of entry |
| Garden bowl | The excavated, flat-bottomed depression that holds water temporarily; should be level from side to side | Depth: 4–8 inches below surrounding grade. Deeper bowls take longer to drain and cause root problems — deeper is not better. |
| Amended soil layer | The specially prepared growing medium that fills the bowl: fast-draining, organically rich, and appropriate for the plants selected | Typically 18–24 inches deep; the most important component of rain garden function |
| Native soil subgrade | The undisturbed native soil below the amended layer; does its own infiltration work in well-draining soils | In clay soils, a transition gravel layer between amended soil and clay subgrade improves drainage |
| Berm (downslope edge) | The raised earthen edge on the low side of the garden, built from the excavated soil; typically 6–12 inches above surrounding grade | Plant the berm with sturdy, erosion-resistant natives that handle both dry conditions and periodic wet feet |
| Overflow structure | A designed overflow for storms exceeding capacity — a rock-armored spillway in the berm, a pipe outlet, or a bioswale leading overflow to a safe discharge point | Every rain garden must have a designed overflow; failure to provide one leads to berm failure in large storms |
| Inlet pipe / downspout connection | For roof runoff, extended downspout pipe carries water to the rain garden inlet; buried or protected from damage | Ensure pipe is disconnected from the storm sewer — see Section 4 for full connection guidance |
| Mulch layer | 2–3 inch layer of shredded hardwood mulch covers the soil surface in the bowl (not the berm) | Use chunky shredded hardwood that knits together — not fine bark that floats away in storm flows |
Rain Garden Soil Mix: The Critical Component
- •Standard Rain Garden Soil Mix (for most sites): 50–60% coarse sand (concrete sand or washed torpedo sand — NOT fine beach sand or play sand, which compact and clog); 20–30% compost (finished, mature compost — not fresh manure or wood chips); 20–25% existing topsoil or native soil (adds biological activity and soil microbes). The mix should be loose, crumbly, and drain quickly when squeezed in your hand.
- •High-Performance Mix (for heavy clay or high-pollution sites): 50% coarse sand or 3/8-inch washed gravel for maximum drainage; 30% compost; 20% native soil or biochar (biochar improves filtration of heavy metals and hydrocarbons).
State-Specific Soil Mix Guidance: Many state cooperative extension services and stormwater programs publish region-specific rain garden soil mix specifications. Search "[your state] rain garden guide PDF" or check your state's Department of Environmental Quality, Department of Natural Resources, or land-grant university extension website for downloadable specifications tailored to local conditions.
Step-by-Step Construction
- •Mark the rain garden outline: Use marking paint, flour, or a garden hose to mark the shape. Kidney, teardrop, and crescent shapes work well — avoid perfect circles or squares, which look artificial.
- •Remove existing turf and vegetation: Strip sod within the bowl area; compost or use it to reinforce the berm.
- •Excavate the bowl: Dig to the design depth. Keep the bottom as level as possible from side to side — use a carpenter's level or laser level to check. The bottom should be flat, not sloped or rounded.
- •Build the berm: Pile excavated soil on the downslope side, compacting in 4–6 inch layers by tamping firmly. Berm top should be 6–8 inches above the surrounding grade. Slope berm sides at 3:1 (horizontal:vertical) to resist erosion.
- •Install underdrains if needed: In heavy clay soils, lay 4-inch perforated PVC pipe in a 6-inch gravel bed at the bottom of the excavation before adding soil mix. Outlet should discharge to a safe location downslope.
- •Install transition layer (clay soils): Spread a 4–6 inch layer of pea gravel or 3/8-inch washed stone directly on the excavated bottom before adding soil mix.
- •Fill with rain garden soil mix: Add prepared soil mix to design depth. The soil surface should be 4–6 inches below the top of the berm. Tamp lightly — do not compact aggressively.
- •Create the inlet: At the upslope entry point, line the inlet area with river rock or pea gravel 12–18 inches wide to absorb the energy of incoming water.
- •Create the overflow: At the downslope end of the berm, create an armored spillway lined with large river rock (3–5 inch stone set 6 inches deep) that channels overflow safely away.
- •Install plants: Plant while soil is moist but not saturated; water in thoroughly. See Section 5 for plant selection guidance.
- •Apply mulch: Cover all bare soil with 2–3 inches of shredded hardwood mulch; keep mulch away from plant crowns.
- •Test with a hose: Before the first real rain, run a garden hose into the inlet for 30 minutes. Observe water entry, distribution, and overflow function. Make adjustments before plants are established.
Timing Your Installation: The best time to build a rain garden is late summer through fall in most U.S. regions — soil is workable, temperatures are moderate for plant establishment, and fall rains help plants root before winter. Spring is the second-best option. In the Southeast and Gulf Coast, late fall through winter is ideal. Avoid building during frozen ground, drought, or during heavy-rain periods when soils are saturated.
Section 4: Connecting Water to Your Rain Garden
A rain garden sitting next to a functioning storm sewer is a decorative garden, not a stormwater feature. The transformative step — the one that makes a rain garden actually work — is disconnecting runoff sources from the storm sewer and routing them into the garden. This section covers how to do that for the three most common water sources: roof downspouts, driveways and paved surfaces, and lawn runoff.
Many homeowners assume connecting a downspout to a rain garden is complicated or requires a plumber. It is neither. The basic connection — extending a downspout with flexible corrugated pipe and directing it to the rain garden inlet — is a two-hour project requiring no special skills.
Downspout Disconnection: The Core Connection
In most American homes, downspouts drain into underground pipes that connect directly to the storm sewer system. Disconnecting one downspout — redirecting its flow to a rain garden instead of the storm sewer — is the single highest-impact action you can take for stormwater management on your property.
Check Local Codes Before Disconnecting: Some municipalities require a permit for downspout disconnection, and a few older cities (particularly those with combined sewer systems, where storm and sanitary sewers share the same pipe) may have specific rules about where disconnected downspouts can discharge. Check with your local stormwater or sewer authority before disconnecting. Most jurisdictions actively encourage disconnection and offer incentives to do it.
Method 1: Flexible Corrugated Pipe Extension (Simplest)
- •Cut the downspout 6–12 inches above ground level using tin snips or a hacksaw
- •Attach a downspout elbow fitting to redirect flow horizontally away from the house
- •Connect flexible corrugated drainage pipe (4-inch diameter) to the elbow; secure with sheet metal screws or hose clamps
- •Route the pipe on the ground surface or slightly buried (2–3 inches deep) across the lawn to the rain garden inlet
- •Terminate at the rock-armored inlet area; the pipe end should discharge onto the rock pad to dissipate energy
- •Install a pop-up emitter at the pipe end to prevent rodents from nesting in the pipe
- •Cost: $30–80 in materials; 2–4 hours of work
- •Limitation: Surface or slightly buried pipe can be a tripping hazard; less aesthetically refined than buried alternatives
Method 2: Buried Solid PVC Pipe (Most Durable)
- •Excavate a trench 12 inches deep from the downspout to the rain garden inlet; slope the trench 1/4 inch per foot toward the garden
- •Cut the downspout and attach a downspout adapter to transition to 4-inch PVC
- •Lay 4-inch solid PVC pipe (not perforated — solid pipe conveys water to the garden rather than infiltrating it in the trench) in the trench
- •Install a cleanout access port at the top of the downspout connection for future maintenance access
- •At the rain garden end, terminate with a flared end cap or pop-up emitter at the inlet rock pad
- •Backfill trench; restore grass or add mulch over the trench line
- •Cost: $100–300 in materials; 4–8 hours of work (more for long runs)
- •Advantage: Permanent, invisible, no tripping hazard; handles any storm volume; cleanable if it becomes clogged
Method 3: Rain Chain + Splash Basin (Most Beautiful)
- •Remove the existing downspout and install a rain chain (decorative copper, aluminum, or stainless steel chain or cup series) in its place
- •Dig a splash basin directly below the rain chain: a shallow depression (18–24 inches wide, 8–12 inches deep) filled with river rock and gravel
- •Connect the splash basin to the rain garden inlet via a surface bioswale or buried pipe
- •Rain chains work best in light to moderate rain; in very heavy downpours, water may splash off before reaching the basin — account for this in overflow planning
- •Cost: $50–200 for rain chain; additional materials for basin and connection
- •Aesthetic payoff is exceptional — rain chains are one of the most beautiful landscape water features available
Routing Driveway and Paved Surface Runoff
- •Identify the low edge: Paved surfaces typically drain to one side or corner; identify where runoff concentrates and exits the paved area
- •Create or enhance a curb cut: A small notch or opening in any concrete edging or curb allows water to flow off the paved area; concrete curb cuts can be cut by a masonry contractor or DIY with an angle grinder and diamond blade ($40–60 blade)
- •Install a bioswale to convey driveway runoff to the rain garden: A vegetated swale along the driveway edge is aesthetically pleasing and provides additional filtration before water reaches the rain garden
- •For sealed driveways with heavy oil or de-icing salt contamination, consider a small gravel forebay at the rain garden inlet: a 2–4 foot wide gravel strip that captures the first flush of heavily contaminated runoff before it enters the planted area
- •Permeable pavers as an alternative: For driveways being repaved or patios being redesigned, permeable pavers or permeable concrete eliminate runoff at the source — water infiltrates through the paving surface itself
Bioswales: Channeling Runoff Beautifully
A bioswale is a vegetated, gently sloped channel that conveys stormwater from its source to a rain garden while also providing additional infiltration and filtration along its length. Where a straight pipe connection gets water to the garden efficiently but invisibly, a bioswale creates a landscape feature — a planted drainage path that is beautiful, functional, and ecologically valuable.
| Bioswale Element | Specification | Purpose |
|---|---|---|
| Width | 2–4 feet minimum; 4–8 feet ideal | Wider swales slow water and increase infiltration; narrower swales are more practical in tight spaces |
| Side slopes | Maximum 3:1 (horizontal:vertical); shallower is better (5:1 or flatter) | Steep sides erode; gentle slopes support dense planting and are easier to mow if needed |
| Bottom grade | 0.5–2% slope toward rain garden; avoid grades steeper than 5% | Gentle grade moves water without erosive velocity; steeper grades require check dams or rock stabilization |
| Check dams | Small rock or log barriers placed perpendicular to flow every 10–20 feet on steeper swales | Slow water velocity on steeper slopes; pool water temporarily to allow infiltration; prevent channel erosion |
| Soil mix | Same as rain garden mix (50% sand, 30% compost, 20% topsoil) in the swale bottom; native soil on side slopes | Fast-draining bottom supports infiltration along swale length; native soil on sides supports vegetation |
| Plants | Dense native groundcovers and low grasses in the bottom (creeping sedges, Blue Wild Rye, Prairie Dropseed); taller natives on the sides | Dense vegetation slows water, holds soil, and provides filtration; deep roots create infiltration channels |
| Rock inlet | 6–12 inch wide rock pad at the uphill intake point; river rock at each check dam | Prevents erosion at water entry points; stabilizes transitions |
Dry Creek Beds: Decorative Conveyance
- •Best use case: When you want to create a naturalistic landscape feature that tells the "story" of water moving through your property; dry creek beds make the water flow visible and intentional
- •Construction: Excavate a shallow channel (4–8 inches deep, 18–36 inches wide); line with landscape fabric (optional — prevents weed growth but reduces infiltration); fill with river rock (2–4 inch cobble at edges, 3–5 inch at the center line)
- •Plants alongside: Native grasses, ferns, and flowering perennials planted along the banks create a natural riparian look; choose moisture-tolerant species that handle periodic splash
- •Function: A dry creek bed from a downspout to a rain garden inlet creates a complete, visible, beautiful water management system — the creek bed conveys water elegantly while the rain garden captures and infiltrates it
- •Sizing: A 24-inch wide dry creek bed can convey the runoff from approximately 1,000–2,000 sq ft of contributing area in moderate storms; for very large drainage areas, size up or use a bioswale instead
Make the Water Path Visible: The most beautiful rain garden systems make the water's journey legible — a rain chain falling into a splash basin, a dry creek bed winding across the yard, and a lush planted rain garden at the end. When visitors see your garden in the rain, they should be able to read immediately what's happening and why. This storytelling approach to rain garden design is more aesthetically rewarding and also educational for neighbors who might be inspired to do the same.
Section 5: Planting the Rain Garden
Plant selection is where a rain garden transforms from a functional drainage feature into a beautiful, ecologically productive garden. The right plants — almost always native species — bring the rain garden to life with seasonal flowers, wildlife habitat, and year-round structure. Rain garden plants face extreme conditions: periods of complete saturation during storms, followed by weeks of dry conditions between rains. Native plants — evolved over thousands of years in local conditions — are almost always the best solution.
The Three Zones of a Rain Garden
| Zone | Location | Moisture Conditions | Plant Requirements | Design Role |
|---|---|---|---|---|
| Zone 1 — Wet Zone (Center/Bottom) | The lowest part of the bowl; where water ponds deepest and longest | Temporarily flooded 24–48 hrs after storms; may stay moist between events | Wet-tolerant natives that handle standing water AND drought; often wetland-edge plants | Functional core — must be most flood-tolerant; typically 40–60% of planted area |
| Zone 2 — Transitional Zone (Bowl Sides) | The slopes of the bowl leading up toward the berm | Wet during storms but drains quickly; moist to dry between rains | Adaptable plants tolerating both periodic wet and dry conditions; the most diverse zone | Aesthetic centerpiece — broadest palette; largest variety of heights and colors; 30–40% of area |
| Zone 3 — Dry Zone (Berm/Edges) | The berm and upper edges, above the design ponding depth | Rarely flooded; dry to occasionally moist; most similar to upland garden conditions | Drought-tolerant natives; sturdy root systems to hold berm structure | Structural edge — prevents erosion; provides visual transition to surrounding landscape; 10–20% of area |
Always prioritize local ecotypes — native plants sourced from your region or nearby — over plants of the same species grown in distant states. Local genetics are adapted to local conditions. Your state's cooperative extension service, native plant society, or local nature center can recommend suppliers of locally sourced plants.
Eastern U.S. — Midwest & Great Lakes (Zones 3–6)
| Plant | Type | Zones | Height | Zone | Bloom / Feature | Notes |
|---|---|---|---|---|---|---|
| Blue Flag Iris (Iris versicolor) | Native perennial | 3–9 | 2–3 ft | 1 — Wet | Blue-violet, May–Jun | Classic wet meadow plant; dramatic flower; excellent Zone 1 anchor; tolerates long inundation |
| Swamp Milkweed (Asclepias incarnata) | Native perennial | 3–8 | 3–4 ft | 1 — Wet | Pink/mauve, Jul–Aug | Essential monarch butterfly host plant; extremely wet-tolerant; fragrant; one of the best rain garden plants in America |
| Joe-pye Weed (Eutrochium purpureum) | Native perennial | 3–8 | 4–7 ft | 1–2 | Dusty pink, Aug–Sep | Tall, dramatic; monarch and swallowtail magnet; excellent at back of garden; tolerates wet and dry |
| Cardinal Flower (Lobelia cardinalis) | Native perennial | 3–9 | 2–4 ft | 1 — Wet | Brilliant scarlet, Jul–Sep | Extraordinary hummingbird plant; thrives in wet soil; short-lived but self-seeds freely |
| Blue Lobelia (Lobelia siphilitica) | Native perennial | 3–8 | 2–3 ft | 1 — Wet | Blue-violet, Aug–Oct | Wet-tolerant companion to cardinal flower; deer-resistant; long blooming |
| Switchgrass (Panicum virgatum) | Native grass | 3–9 | 3–6 ft | 1–2 | Airy seed plumes, fall | Essential prairie and wetland edge grass; excellent erosion control; fall color; wildlife food and shelter |
| Soft Rush (Juncus effusus) | Native rush | 4–9 | 2–3 ft | 1 — Wet | Architectural form year-round | Evergreen in mild climates; vertical structure; exceptional tolerance for prolonged flooding |
| Buttonbush (Cephalanthus occidentalis) | Native shrub | 4–10 | 5–12 ft | 1 — Wet | White spherical, Jul–Aug | Premier wet-zone shrub; tolerates standing water for months; extraordinary wildlife value; unique golf-ball flowers |
| Purple Coneflower (Echinacea purpurea) | Native perennial | 3–9 | 2–4 ft | 2 — Mid | Purple-pink, Jul–Sep | The quintessential prairie perennial; long-blooming; birds eat seeds; drought and wet tolerant |
| Black-eyed Susan (Rudbeckia fulgida) | Native perennial | 3–9 | 2–3 ft | 2–3 | Yellow-gold, Jul–Oct | Iconic; long-blooming; adaptable to both wet and dry conditions |
| New England Aster (Symphyotrichum novae-angliae) | Native perennial | 3–8 | 3–5 ft | 2–3 | Purple-violet, Sep–Oct | Critical late-season bloom for migrating monarchs and native bees; tolerates wet and dry |
| Little Bluestem (Schizachyrium scoparium) | Native grass | 3–9 | 2–3 ft | 2–3 — Dry | Copper-orange fall color | Quintessential native grass; drought-tolerant once established; excellent berm plant |
| Silky Dogwood (Cornus amomum) | Native shrub | 4–8 | 6–10 ft | 1–2 | White, May–Jun; blue berries | Thrives in wet soil; birds love berries; multi-season interest; excellent for larger rain gardens |
Eastern U.S. — Mid-Atlantic & Southeast (Zones 6–9)
| Plant | Type | Zones | Height | Zone | Bloom / Feature | Notes |
|---|---|---|---|---|---|---|
| Virginia Iris (Iris virginica) | Native perennial | 5–9 | 2–3 ft | 1 — Wet | Blue-violet, Apr–May | Native wetland iris; earlier bloom; essential for southeastern rain gardens |
| Rose Mallow (Hibiscus moscheutos) | Native perennial | 4–9 | 4–8 ft | 1 — Wet | Huge white/pink/red, Jul–Sep | Spectacular dinner-plate flowers; loves wet soil; one of most dramatic natives in bloom |
| Pickerelweed (Pontederia cordata) | Native perennial | 3–10 | 2–3 ft | 1 — Wet | Purple-blue spikes, Jun–Oct | Thrives in standing water; continuous bloom; excellent Zone 1 anchor for wet sites |
| Blue Wild Indigo (Baptisia australis) | Native perennial | 3–9 | 3–4 ft | 2–3 | Indigo blue, May–Jun | Long-lived; architectural seedpods; very drought and wet adaptable; stunning in bloom |
| Inkberry Holly (Ilex glabra) | Native shrub | 4–9 | 4–8 ft | 1–2 | Black berries fall–winter | Evergreen native shrub; thrives in wet soil; important winter wildlife food |
| Gulf Muhly (Muhlenbergia capillaris) | Native grass | 6–10 | 3–4 ft | 2–3 | Pink-magenta cloud, Sep–Nov | Spectacular fall bloom; drought-tolerant; one of the most beautiful native grasses |
| Beautyberry (Callicarpa americana) | Native shrub | 6–10 | 4–6 ft | 2–3 | Magenta berries, Sep–Nov | Extraordinary fall fruit display; drought-tolerant once established; excellent berm shrub |
Midwest & Central U.S. — Prairie States (Zones 4–7)
| Plant | Type | Zones | Height | Zone | Bloom / Feature | Notes |
|---|---|---|---|---|---|---|
| Rattlesnake Master (Eryngium yuccifolium) | Native perennial | 3–9 | 3–5 ft | 2–3 | White globe, Jul–Aug | Unique architectural plant; extremely drought-tolerant; dramatically sculptural |
| Cup Plant (Silphium perfoliatum) | Native perennial | 3–9 | 6–8 ft | 1–2 | Yellow, Jul–Sep | Leaf bases collect water (bird drinking bowl!); very wet-tolerant; tall and dramatic |
| Ironweed (Vernonia fasciculata) | Native perennial | 3–8 | 3–5 ft | 1–2 | Vivid purple, Aug–Sep | Brilliant purple; intensely attractive to monarchs and swallowtails; wet-tolerant |
| Prairie Dropseed (Sporobolus heterolepis) | Native grass | 3–9 | 2–3 ft | 2–3 | Fragrant seed plumes, Aug | One of America's finest native grasses; fragrant popcorn-scented flowers; very adaptable |
| Wild Senna (Senna hebecarpa) | Native perennial | 3–9 | 3–5 ft | 2–3 | Yellow, Jul–Aug | Host plant for sulphur butterflies; adaptable to wet-moist-dry conditions |
| Wild Quinine (Parthenium integrifolium) | Native perennial | 4–8 | 2–4 ft | 2–3 | White, Jun–Sep | Long-lasting white blooms; heat and drought tolerant; native bee specialist plant |
Western U.S. — Pacific Coast & Mountain West (Zones 4–9)
| Plant | Type | Zones | Height | Zone | Bloom / Feature | Notes |
|---|---|---|---|---|---|---|
| California Fuchsia (Epilobium canum) | Native perennial | 5–10 | 1–3 ft | 2–3 | Orange-red, Aug–Nov | California and Pacific Southwest native; extraordinary late-season bloom; hummingbird plant; excellent berm |
| Monkey Flower (Erythranthe spp.) | Native perennial | 4–9 | 1–2 ft | 1 — Wet | Yellow or red, spring–summer | Native to wet seeps; one of the most wet-tolerant western natives; hummingbird plant |
| Douglas Spiraea (Spiraea douglasii) | Native shrub | 4–8 | 4–6 ft | 1–2 | Pink plumes, Jun–Aug | Pacific NW native; thrives in wet conditions; excellent shrub for larger Pacific NW rain gardens |
| Rush (Juncus patens) | Native rush | 5–10 | 2–3 ft | 1 — Wet | Evergreen; architectural form | Pacific Coast native; highly wet-tolerant; good for wet zone plantings |
| Yarrow (Achillea millefolium) | Native perennial | 3–9 | 1–3 ft | 2–3 | White/yellow/pink, Jun–Sep | Extremely adaptable western native; excellent pollinator; good berm plant; tolerates drought |
| Narrowleaf Milkweed (Asclepias fascicularis) | Native perennial | 6–10 | 2–3 ft | 2–3 | White-lavender, Jul–Sep | Primary western monarch milkweed; drought-tolerant once established |
Desert Southwest (Zones 7–11)
| Plant | Type | Zones | Height | Zone | Bloom / Feature | Notes |
|---|---|---|---|---|---|---|
| Desert Willow (Chilopsis linearis) | Native shrub/tree | 7–11 | 10–25 ft | 1–2 | Pink-purple tubular, May–Sep | Thrives in desert washes; hummingbird plant; essential SW rain garden anchor |
| Sacaton Grass (Sporobolus airoides) | Native grass | 5–10 | 2–4 ft | 1–2 | Airy purple plumes, summer | Native to desert washes; adapted to wet-dry cycles; excellent structural SW grass |
| Desert Marigold (Baileya multiradiata) | Native perennial | 6–10 | 1–2 ft | 2–3 | Bright yellow, Mar–Nov | One of the longest-blooming desert natives; very drought-tolerant |
| Fairy Duster (Calliandra eriophylla) | Native shrub | 7–11 | 2–3 ft | 2–3 | Pink powder-puff, Feb–May | Low spreading native shrub; hummingbird and native bee plant; very drought-tolerant |
| Desert Hackberry (Celtis pallida) | Native shrub | 7–11 | 6–15 ft | 2–3 | Small fruit; birds | Drought-tolerant; important wildlife food plant; provides structure and shade |
Universal Rain Garden Plants: Work Almost Everywhere
| Plant | Zones | Zone | Key Feature | Grow This If… |
|---|---|---|---|---|
| Swamp Milkweed (Asclepias incarnata) | 3–8 | 1 — Wet | Pink flowers; monarch host; fragrant | You want the single most wildlife-valuable rain garden plant; non-negotiable in any eastern rain garden |
| Switchgrass (Panicum virgatum) | 3–9 | 1–2 | Graceful; fall color; wildlife cover | You want the best structural grass — works in nearly every wet-to-dry condition across the country |
| Purple Coneflower (Echinacea purpurea) | 3–9 | 2 | Long-blooming; birds eat seeds; hardy | You want a reliable beautiful perennial with extraordinary adaptability and proven performance everywhere |
| Blue Wild Indigo (Baptisia australis) | 3–9 | 2–3 | Architectural; long-lived; deep roots | You want a permanent deeply rooted plant that improves over decades — a 20-year investment that pays forever |
| Black-eyed Susan (Rudbeckia fulgida) | 3–9 | 2–3 | Long-blooming gold; seeds for birds | You want reliable midsummer-through-fall color with minimal care across wide conditions |
| New England Aster (Symphyotrichum novae-angliae) | 3–8 | 2–3 | Fall color; monarch migration fuel | You want to support monarch butterflies on fall migration — one of their most critical nectar plants |
| Buttonbush (Cephalanthus occidentalis) | 4–10 | 1 — Wet | Unique golf-ball flowers; wet shrub | You want a shrub that handles standing water — nothing tolerates prolonged inundation better |
| Little Bluestem (Schizachyrium scoparium) | 3–9 | 2–3 | Copper fall color; drought-tolerant | You want the most beautiful berm grass — spectacular copper-orange fall color and excellent drought tolerance |
| Wild Bergamot (Monarda fistulosa) | 3–9 | 2–3 | Native bee specialist; aromatic | You want a plant that supports native bees — one of the most important native bee plants in North America |
| Soft Rush (Juncus effusus) | 4–9 | 1 — Wet | Architectural; evergreen; very wet | You have a wet Zone 1 that stays saturated — rushes are built for exactly this condition |
Section 6: Aesthetic Design Principles
A rain garden that looks like a maintenance lapse — a weedy muddy depression — fails its owner in a different way than one that fails to drain. A rain garden designed with aesthetic intention is not just more pleasant to live with — it is also more likely to earn neighborhood converts, because beautiful things inspire imitation. The good news is that rain garden aesthetics and function are not in tension. The same principles that make a rain garden work beautifully — layered planting, seasonal interest, naturalistic form — are the same principles that make it look like a thoughtfully designed garden.
Shape and Form: The Foundation of Appearance
- •Naturalistic curves: Use a garden hose to lay out the shape before marking or digging; adjust until the curve looks natural from multiple vantage points — the kitchen window, the street, and the back porch. Kidney, crescent, and teardrop shapes integrate more gracefully than circles or rectangles.
- •Aspect ratio: Rain gardens look best when wider than they are deep — a roughly 2:1 width-to-depth ratio (as read from above) is pleasing. A very narrow elongated shape reads as a ditch; a very wide shallow shape reads as a mulched area.
- •Placement in the landscape: A rain garden placed at the natural terminus of a slope reads as appropriate; one placed seemingly at random on flat ground looks puzzling unless the water source (dry creek, bioswale, visible downspout pipe) is evident. Connect the rain garden visually to its water source.
- •Edge treatment: The transition between rain garden and surrounding lawn is as important as the garden itself. A clean, crisp edge (maintained with a flat spade) communicates "intentional garden." A ragged or undefined edge reads as "neglected area." Edge once per season.
- •Hardscape integration: A simple pathway of stepping stones around or through a larger rain garden allows access for maintenance and viewing. A small bench near a beautiful rain garden with fragrant natives turns it from a stormwater feature into a garden destination.
Planting Design: Creating a Composed Garden
- •Use the rule of threes and fives: Plant in groups of 3, 5, or 7 of the same species rather than planting one of everything. A mass of seven switchgrasses creates a visual anchor; seven individual specimens of seven different species creates a chaotic collection.
- •Layer by height: Tallest plants (Joe-pye weed, cup plant, buttonbush) at the back or center; medium height (blazing star, coneflower, asters) in the middle; low spreading plants (soft rush, creeping sedges) at the front edges.
- •Plan for seasonal sequence: The best-designed rain gardens bloom from spring through late fall. Early: wild columbine, blue flag iris → midsummer: cardinal flower, blazing star, bergamot → late summer: coneflower, aster, joe-pye → fall: seedheads and copper-orange grasses for winter structure.
- •Repeat key plants: A single species repeated in multiple spots creates visual rhythm and unity. Switchgrass appearing three times through a garden ties the composition together.
- •Contrast form and texture: Pair fine-textured grasses with bold-leafed perennials (Joe-pye with prairie dropseed; cardinal flower with switchgrass). The contrast makes both plants more interesting.
- •Use native grasses as the backbone: Ornamental grasses provide year-round structure, movement, and winter interest. A rain garden designed around a grass backbone — with flowering perennials filling in around it — holds its visual integrity through every season.
Seasonal Interest: Something Beautiful Every Month
| Season | What Provides Interest | Key Plants | Design Emphasis |
|---|---|---|---|
| Early Spring (Mar–Apr) | Early bulbs; emerging perennial foliage; fresh green of new growth | Wild columbine, early blue flag iris, emerging switchgrass, native bulbs | The freshness of new growth is itself beautiful; let the native emergence be the show |
| Late Spring (May–Jun) | First major bloom flush; blue flag iris at full bloom | Blue flag iris, wild columbine, baptisia, cardinal flower beginning | Peak color relative to the season; often the most photographed moment in a rain garden |
| Midsummer (Jul–Aug) | Peak bloom; maximum wildlife activity; hummingbirds, butterflies, and native bees at their busiest | Cardinal flower, swamp milkweed, blazing star, joe-pye weed, switchgrass plumes emerging | The most abundant season; ensure enough late-blooming plants to maintain interest into fall |
| Late Summer / Fall (Sep–Oct) | Aster bloom; monarch migration; seed development; grass color turning copper and orange | New England aster, goldenrod, sneezeweed, switchgrass copper, little bluestem orange | One of the most spectacular seasons — the fall color of native grasses rivals any ornamental tree |
| Winter (Nov–Feb) | Seedhead structure; dried grass plumes; snow accumulation on standing stems; bird feeding activity | Switchgrass, coneflower seedheads, joe-pye dried heads, soft rush | Leave all stems standing through winter: structural beauty in snow, critical bird food, and insect overwintering habitat |
Integrating the Rain Garden into the Existing Landscape
- •Connect to existing planting beds: Where possible, design the rain garden to flow organically into adjacent beds rather than sitting as an island in lawn. This creates a larger overall garden space and makes both features look more intentional.
- •Match materials: If your home uses certain stone types in its architecture, use the same stone family for inlet rock armoring, dry creek bed cobbles, or stepping stones. Material consistency ties the rain garden to the house aesthetically.
- •Consider the view from inside: The window you look out of most — kitchen sink, home office, living room — should be considered in rain garden placement. A rain garden visible from your most-used vantage point pays daily aesthetic dividends.
- •Front yard considerations: Front yard rain gardens face additional scrutiny. A small interpretive sign explaining what it is and why it's there transforms confusion into curiosity and often inspires neighbors to do the same.
- •HOA and neighborhood context: In neighborhoods with formal landscape norms, a rain garden can be designed to look entirely conventional from a distance — a simple depression with native plants looks almost identical to a traditional perennial border when well-maintained. The key is edge definition and visible care.
The most beautiful rain garden systems tell a story: the water's journey from roof to rain chain to dry creek bed to planted garden is legible, intentional, and beautiful at every step. Design the whole system — not just the garden in isolation — and the result will be a landscape feature that educates and inspires everyone who sees it.
Costs, Budgeting & DIY vs. Hiring
One of the most common frustrations for homeowners researching rain gardens is the absence of honest cost information. Guides describe the technique in detail but leave readers with no idea whether they're planning a $200 weekend project or a $5,000 contractor engagement. The answer is both — and everything in between — depending on garden size, soil conditions, DIY vs. professional labor, and plant sourcing choices.
Cost Breakdown by Component
| Component | DIY Cost Range | Contractor Cost Range | Notes |
|---|---|---|---|
| Soil testing (perc test + lab soil test) | $0–80 | N/A — do this yourself | DIY perc test is free; professional lab soil test through county extension is $15–50 and worth it for unknown soils; skip professional lab if you know your soil type |
| Soil mix materials (per 100 sq ft, 18" deep) | $150–300 | $300–600 installed | Coarse sand: $40–80/cubic yard; compost: $30–60/cubic yard; a 200 sq ft garden needs approximately 3–4 yards of mix total |
| Excavation (100–300 sq ft garden) | $0 (hand digging) | $200–800 (mini-excavator or hand labor) | A 300 sq ft garden at 18" depth = approximately 14 cubic yards of soil to move; most homeowners can hand-dig a 100–150 sq ft garden over 1–2 weekends |
| Mini-excavator rental (if needed) | $200–350/day | Included in labor | Most rental companies require a credit card but no special license; mini-excavators are surprisingly easy to operate; consider for gardens larger than 150 sq ft |
| Plants (per 100 sq ft of garden) | $75–250 (bare-root and plugs) | $200–500 (1-gallon containers installed) | Buying bare-root or plug-size native plants from native plant societies or specialty nurseries reduces cost 50–75% vs. 1-gallon containers |
| Mulch (2–3 in layer over rain garden) | $30–80 (self-haul bulk) | $80–180 (delivered) | Bulk shredded hardwood mulch is far less expensive than bagged; most municipalities offer free wood chip mulch programs (call parks department) |
| Inlet rock armoring (river rock) | $30–80 | $100–200 installed | River rock or cobble (2–4 in size); typically 1–2 tons for a residential installation; local stone yards much less expensive than bagged stone |
| Downspout connection — flex pipe method | $30–80 | $150–300 installed | Flexible corrugated pipe, elbow fittings, pop-up emitter; the simplest connection method |
| Downspout connection — buried PVC method | $100–250 | $300–600 installed | Solid PVC pipe, fittings, trench excavation; more permanent and attractive than surface flex pipe |
| Dry creek bed or bioswale (per 20 linear feet) | $100–300 DIY | $400–900 installed | River rock, landscape fabric (optional), plants alongside; adds significant aesthetic value |
| Underdrain system (if needed in clay soils) | $100–300 materials | $400–900 installed | 4-in perforated PVC, gravel, clean-outs; only needed in heavy clay that fails the perc test; adds significant drainage capacity |
| Professional design/consultation | N/A | $300–1,500 for site design | Most cooperative extension offices and some municipalities offer free or low-cost design assistance; worth it for complex sites |
Total Project Cost Estimates
| Project Type | Garden Size | Description | DIY Total | Contractor Total |
|---|---|---|---|---|
| Minimal starter garden | 100–150 sq ft | Hand-dug; basic soil amendment; plug plants from native plant sale; flex pipe downspout connection; hand-spread mulch | $250–500 | $800–1,500 |
| Mid-size standard garden | 200–300 sq ft | Mini-excavator or contractor excavation; full soil mix replacement; 1-gallon native plants from nursery; buried PVC downspout connection; bulk mulch | $600–1,200 | $2,000–4,000 |
| Large garden with features | 300–500 sq ft | Full excavation; engineered soil mix; dry creek bed or bioswale connection; professionally sourced native plants; rock work; underdrain if needed | $1,000–2,500 | $4,000–8,000 |
| Complex/challenging site | Any size with clay soils, large drainage area, or steep grade | Soil amendment, underdrain, professional design, extensive rock work, engineered overflow structure | $1,500–4,000 | $5,000–15,000+ |
Before finalizing your budget, research available rebates and incentives. A $500 municipal rebate on a $1,000 DIY project reduces your out-of-pocket cost to $500 — halving the effective cost. Some utilities and state programs cover 50–100% of costs for qualifying installations. Free plant giveaways from native plant societies can reduce the plant budget to near-zero. Factor incentives into your planning before assuming the project is out of budget.
DIY vs. Hiring a Professional: An Honest Guide
| Situation | DIY or Professional? | Why |
|---|---|---|
| Small garden (under 150 sq ft), good soil drainage, flat or gentle slope, simple downspout connection | DIY — ideal candidate | Manageable excavation by hand over 1–2 weekends; straightforward construction; low risk of error; a great weekend project that teaches you about your land |
| Medium garden (150–300 sq ft), average soil conditions, moderate slope, buried pipe connection | DIY with mini-excavator rental, or hybrid approach | Rent a mini-excavator for the excavation portion; do planting and finishing yourself; saves 40–60% of contractor cost while removing the most physically demanding work |
| Large garden (300+ sq ft), or any size with very heavy clay soil that needs underdrain | Professional excavation + DIY planting | Excavation and soil replacement at this scale is beyond practical DIY; hire a contractor for construction and do planting yourself — this hybrid reduces cost while preserving the most personally meaningful part of the project |
| Complex site: steep slopes, near foundation concerns, large drainage area, formal front yard | Professional design and construction | The risk of error on complex sites — erosion, foundation issues, aesthetics that miss HOA standards — justifies professional involvement; hire a landscape architect for design even if a general contractor does the labor |
| Budget is the primary constraint | DIY with patience and native plant society plants | A small rain garden (100 sq ft) built over several weekends with plug plants from a native plant society sale can be built for $200–400 in materials — start small and expand later |
| You want to learn the process and engage with your land | DIY regardless of garden size | There is genuine value in understanding how water moves through your property, what your soil is like, and which plants succeed in your conditions. DIY installation teaches you your land in a way no contractor visit can replicate. |
Finding and Working with a Rain Garden Contractor
- •Ask your local cooperative extension service: Extension offices often maintain lists of landscapers trained in native plants and stormwater management; they may also offer a referral service for rain garden installers.
- •Contact your state's professional landscape organization: State chapters of the American Society of Landscape Architects (ASLA) or the Association of Professional Landscape Designers (APLD) can provide referrals to designers with native plant and stormwater experience.
- •Ask for photos of previous rain gardens: A contractor who can't show you photos of rain gardens they've previously installed has probably not built many; review their work and talk to previous clients.
- •Confirm they understand native plants: Ask specifically which native plant species they recommend for your region and why; a contractor who recommends only non-native ornamentals doesn't understand the project.
- •Get the soil mix specification in writing: Ask what soil mix they plan to use and get it specified in the contract; this is the most important material in the project and should be clearly defined.
- •Ask about the overflow design: A contractor who hasn't thought about overflow is not thinking about your project correctly; the overflow design is a non-negotiable component of any rain garden.
Regional Rain Garden Guide
Rain garden design principles are universal — but specific challenges, soil conditions, rainfall patterns, and best plant palettes vary significantly across America's diverse climate regions. This section addresses the primary regional considerations that affect siting, sizing, construction, and planting in each part of the country.
| Region | Rainfall Pattern | Common Soil Challenge | Sizing Considerations | Seasonal Design Notes | Key Resources |
|---|---|---|---|---|---|
| New England (ME, NH, VT, MA, RI, CT) | Fairly evenly distributed year-round; 40–55 in annual; some winter precipitation as snow and ice | Glacial soils vary widely — excellent sandy loam in some areas; rocky glacial till in others; test before assuming drainage | Standard sizing (25–35% of drainage area) works for most sites; snowmelt can contribute significant spring loading | Freeze-thaw cycles may move rocks and shift berm structure; inspect every spring; choose plants rated to Zone 4 minimum | UMass Extension, UConn Extension, NH Sea Grant |
| Mid-Atlantic (NY, NJ, PA, MD, DE, VA) | Moderate year-round; 40–50 in annual; summer thunderstorms; some winter snow | Heavy clay soils common particularly in Piedmont; many older suburban lots have severely compacted soils from construction | Clay soils require larger sizing (35–45%); soil amendment often required; many localities offer design assistance and rebates | Hurricane and nor'easter events can bring extreme rainfall exceeding design capacity — ensure overflow is robust | MD Dept. of Environment, Chesapeake Bay Program, NY DEC |
| Southeast (NC, SC, GA, AL, FL) | Summer-dominant; intense thunderstorms; 50–65 in annual in many areas; mild winters | Sandy coastal soils drain very fast; red Piedmont clay drains slowly; Florida Flatwoods soils have seasonal high water table | Sandy coastal soils: 15–20% sizing; Piedmont clay: 40–50%; check seasonal high water table in Florida — rain gardens cannot function where groundwater is within 2 feet of surface | Year-round gardening possible; consider wet vs. dry season patterns; many native plants evergreen and provide winter interest | NC State Extension, UF IFAS, UGA Extension |
| Gulf Coast & Texas (TX, LA, MS, AL coastal) | Highly variable; Gulf Coast 50–70 in; West Texas under 15 in; extreme rainfall events from tropical systems | Expansive black clay in many areas; drains extremely slowly; often requires engineered underdrain and aggressive amendment | Black clay requires 50–60% sizing minimum plus underdrains; high-rainfall Gulf events can overwhelm large gardens — robust overflow essential; consider multiple smaller gardens | Tropical storm events test overflow structures; ensure overflow can handle very large volumes | Texas A&M AgriLife Extension, LSU AgCenter |
| Great Lakes & Upper Midwest (OH, IN, IL, WI, MI, MN) | Fairly even year-round; 30–40 in annual; significant snowmelt in spring; cold winters | Variable; excellent loam in agricultural areas; heavy clay in many suburban areas; compacted soils in older developments | Standard sizing (30–40%); spring snowmelt can be significant water source; freeze-thaw can affect berm stability | Winter hardiness to Zone 3–4 required; native prairie plants ideal for Midwest rain gardens; Minnesota has an outstanding state rain garden program | Minnesota Pollution Control Agency, Wisconsin DNR, Chicago Wilderness Alliance |
| Great Plains (KS, NE, ND, SD, OK, eastern CO) | Highly variable; West is semi-arid (15–25 in); East is more humid (30–40 in); intense thunderstorms | Good loam in eastern areas; sandy to loamy soils across plains; excellent native plants adapted to wet-dry cycles | Arid western plains: size to capture all available runoff from small storms; eastern plains: standard sizing | Native prairie plants are perfectly evolved for plains rain gardens; drought-tolerant species essential in western portions | Kansas State Extension, Nebraska Extension, SDSU Extension |
| Mountain West (CO, UT, WY, ID, MT, NV, NM) | Generally arid to semi-arid; 10–20 in annual; snowpack-driven spring runoff; intense summer monsoon in southern areas | Alkaline soils common; excellent drainage in many areas (sandy, rocky); limited organic matter | Smaller gardens work in dry regions — even small gardens capture significant percentage of local rainfall; alkaline soil may need pH adjustment for some native plants | Capture every drop in arid West; native xeric plants essential; monsoon timing important in NM and AZ | Colorado State Extension, University of Wyoming Extension, NM State Extension |
| Pacific Northwest (WA, OR, northern CA coast) | Very wet winters; very dry summers; 35–80 in annual (varies enormously); most rain falls October–April | Excellent soils in many areas; some heavy clay in valleys; summer drought means gardens must support drought-tolerant plants despite wet winters | Standard to larger sizing; winter rain season is the primary design event; plants must handle winter saturation AND summer drought | Pacific NW native plants are ideally adapted to winter-wet, summer-dry conditions; invasive species management important | Oregon State Extension, WSU Extension, Portland Bureau of Environmental Services |
| California (central and southern) | Mediterranean climate; wet winters (Dec–Mar), completely dry summers; 10–25 in annual (highly variable) | Variable; clay soils in valleys; sandy soils near coast; alkaline soils in inland areas; summer-dry soils may become water-repellent (hydrophobic) | Size for winter storms; plants must handle summer drought; California native plant palette is perfect for this challenge; fire-resistant plant selection important in fire-prone areas | Cal natives like Blue-eyed Grass, California Fuchsia, and native sedges are ideal; no irrigation needed after establishment in most areas | UC Cooperative Extension, California Native Plant Society, Bay Area SMAA |
| Desert Southwest (AZ, NM, southern NV, southern CA desert) | Bimodal rainfall — winter Pacific storms and summer monsoon; 5–15 in annual; intense but brief monsoon storms | Alkaline caliche soils common; excellent drainage but may have hardpan; organic matter very low | Traditional water harvesting practices here (earthworks, berms, and planted basins) are the historical predecessors of modern rain garden design; even small gardens capture most of a site's annual rainfall | Monsoon season (July–September) delivers most annual rainfall in intense events; drought-adapted plants essential; look to traditional water harvesting practices for design wisdom | University of Arizona Extension, Brad Lancaster's Rainwater Harvesting books, Tucson Water Harvesting Ordinance |
Green Infrastructure Integration
A rain garden on its own is a powerful stormwater management tool. A rain garden combined thoughtfully with rain barrels, permeable paving, bioswales, and native landscaping across a property — or across a neighborhood — is an entirely different level of impact. This section covers how to integrate your rain garden into a more comprehensive green infrastructure system and what each additional tool contributes.
Rain Barrels and Cisterns: Capture Before the Garden
- •How to connect them: Install a rain barrel at the downspout; connect the barrel overflow (a port near the top) to the rain garden via flexible pipe or buried PVC. When the barrel is full, overflow routes automatically to the rain garden. This captures the first flush in the barrel (for irrigation use) and routes remaining runoff to infiltration.
- •Capacity sizing: A standard 50–80 gallon rain barrel fills in minutes from a modest rainfall on a typical roof; a cistern (300–5,000 gallons) can capture the first inch or more of a storm from the full roof. For most homeowners, a single 50-gallon barrel plus a rain garden provides the best practical balance of water harvesting and infiltration.
- •Mosquito control in barrels: Rain barrels must have a tight-fitting lid or fine mesh screen over the inlet to prevent mosquito breeding. Check after each storm; any standing water in a barrel that is open to mosquito access will produce larvae within days in warm weather.
- •Legal considerations: Most states allow rainwater harvesting; some western states have historically restricted it due to water rights laws, though many have updated these laws in recent years. Colorado now allows up to two 55-gallon rain barrels per household. Check your state's current rules before installing.
- •Pairing irrigation with rain garden watering: During establishment, use saved rainwater from your barrel to water rain garden plants during dry spells; this closes the loop — the rain garden is established using rain collected from your own roof.
Permeable Paving: Infiltration at the Source
Permeable paving surfaces allow rainfall to infiltrate directly through the paving surface rather than running off. Where a rain garden captures runoff after the fact, permeable paving eliminates runoff at the source.
| Permeable Paving Type | Best For | Cost Range | Maintenance | Integration with Rain Garden |
|---|---|---|---|---|
| Permeable Interlocking Concrete Pavers (PICP) | Driveways, patios, parking areas with moderate traffic; highest aesthetic versatility | $15–30/sq ft installed | Vacuum-sweep joints annually; avoid sand or silt from other areas washing into joints | PICP driveways dramatically reduce rain garden sizing requirements; any remaining runoff edges can be directed to rain garden as primary capture |
| Permeable concrete / asphalt | Driveways and parking areas; utilitarian; most cost-effective large-area option | $8–15/sq ft installed | Clear joints of sediment with pressure washing every 2–3 years; avoid sand salt in winter (clogs pores) | Eliminates most driveway runoff; pair with a small rain garden at edges for any residual flow |
| Gravel / crushed stone | Pathways, parking areas, informal driveways; most affordable permeable option | $2–6/sq ft installed | Rake periodically; add fresh gravel every 3–5 years; keep edged to prevent migration | Simple to install; very effective; excellent for pathways adjacent to rain gardens; not suitable for main vehicle driveways due to tracking |
| Stepping stones with permeable gaps | Pedestrian paths; patio areas with low traffic | $3–10/sq ft installed | Maintain groundcover between stones; reset any that heave from frost | Allows significant infiltration between stones; plant rain garden plants in gaps for unified aesthetic; beautiful and functional |
| Stabilized decomposed granite | Dry climate patios, paths, low-traffic parking in arid regions | $2–5/sq ft installed | Re-level after heavy rains; apply stabilizer every 2–3 years in trafficked areas | Excellent in desert and California climates; pairs naturally with xeric native plantings; lower infiltration rate than PICP but significant improvement over concrete |
Native Lawn Alternatives: Reducing Runoff Across the Property
- •Low-growing native groundcovers (wild ginger, native violets, Pennsylvania sedge, creeping thyme) can replace lawn in areas where a low, walkable surface is desired; they absorb 50–80% more rainfall than mowed turf.
- •Native meadow plantings (seeded native grass and wildflower mixes) are the most dramatic runoff reduction option — mature meadow plantings with deep native grass roots absorb 90%+ of rainfall, generating virtually no runoff.
- •No-mow lawn alternatives (fine fescue mixes, buffalo grass in appropriate climates) require little to no mowing, no irrigation, and no fertilizing after establishment; they absorb more rainfall than conventional turf due to deeper root systems and better soil health.
- •Reducing lawn area is complementary to rain garden installation; every square foot of native planting added is a square foot removed from the contributing drainage area, which may allow a smaller rain garden to serve the same property effectively.
Neighborhood-Scale Rain Garden Networks
- •Talk to your neighbors: Explaining your rain garden — especially a beautiful, well-maintained one — to neighbors is the most effective advocacy. Many rain garden installations have been followed by multiple neighbors building their own within a season.
- •Reach out to your watershed group: Most American communities have a watershed association, land conservancy, or environmental advocacy organization that tracks stream health and promotes stormwater practices. Connecting with these groups can provide resources, plant sourcing, and community support.
- •Contact your municipality: Many cities have stormwater goals they are working to achieve under EPA MS4 permits; a homeowner proposing to build a rain garden is helping the city meet its compliance targets, and many municipal stormwater coordinators will provide free design assistance, plants, or even installation support for private projects that advance their compliance goals.
- •Document and share: Photograph your rain garden across seasons; track rainfall events and note when the garden is performing. Before-and-after documentation of a flooding area being transformed by a rain garden is powerful and shareable content that inspires others.
Maintenance & Long-Term Care
A well-designed and well-planted rain garden is one of the most low-maintenance landscape features available — far less work than a conventional lawn or traditional flower border. However, "low maintenance" does not mean "no maintenance." Particularly in the first two years while plants establish, regular attention is needed. After that, annual maintenance tasks keep the garden performing at its best for decades.
Year 1: The Establishment Phase
- •Water regularly during establishment: Native rain garden plants still need supplemental watering during their first summer even though they are drought-tolerant once established. Water every 3–5 days during dry spells for the first 8–12 weeks.
- •Weed aggressively: Weeds are the primary threat to rain garden establishment. Identify and remove non-native weeds before they set seed. Hand-pulling is preferred over herbicides. Weed every 1–2 weeks in the first season.
- •Check drainage after every rain: Confirm water flows in, distributes through the garden, and drains within 24–48 hours. Address any drainage slower than this immediately.
- •Watch for erosion: Inspect the inlet area, berm slopes, and overflow structure after each significant storm. Address any erosion immediately — a small rut becomes a large channel if left unaddressed.
- •Add mulch as needed: Mulch settles and decomposes through the first season; add additional shredded hardwood mulch to maintain a 2–3 inch depth.
Year 2 and Beyond: Annual Maintenance Calendar
| Season | Task | Details |
|---|---|---|
| Early Spring | Cut back previous year's growth | Cut or pull previous season's dead stems to 4–6 inches above ground before new growth emerges. Leave intact through winter for wildlife habitat — cut in late March/April, not in fall. |
| Early Spring | Inspect inlet and overflow structures | Check for debris blocking the inlet or clogging the overflow; clear any blockages before rain season. Check berm integrity after winter frost heaving. |
| Early Spring | Add fresh mulch if needed | Maintain 2–3 inch mulch depth in the bowl. Pull mulch back from plant crowns. Use shredded hardwood, not bark chips or rubber mulch. |
| Spring–Summer | Weed throughout growing season | Remove weeds before they set seed. After Year 2, weed pressure decreases significantly as native plants fill in. A 2-hour monthly walk-through is typically sufficient for an established garden. |
| Spring–Summer | Divide overcrowded plants | Divide aggressive spreaders (asters, switchgrass, joe-pye weed) every 2–3 years; use divisions to expand the garden or share with neighbors. |
| Summer | Monitor drainage after storms | Occasional check that the garden is draining within 48 hours. If drainage slows over time, the soil surface may be clogging with fine sediment — cultivate lightly with a hand fork or add compost to revive drainage. |
| Fall | Leave plants standing through winter | Do NOT cut back in fall. Dead stems provide critical overwintering habitat for native bees, food for birds, and visual interest. Cut in spring. |
| Fall | Remove invasive plants before they spread | Fall is when many invasive species set seed. Identify and remove invasive plants before seed dispersal — purple loosestrife, reed canary grass, Japanese knotweed, common reed (Phragmites), and garlic mustard are common threats. |
| Fall / Every 5 Years | Sediment removal from inlet | Stormwater carries suspended sediment that gradually reduces soil porosity. Every 5–10 years, remove and replace the top 2–3 inches of sediment-laden soil in the inlet area; stir and aerate soil in the bowl center. |
| Anytime | Inspect and repair overflow structure | After major storm events, check that the overflow structure is intact and functioning. Replace displaced rocks. Repair any erosion channels immediately. |
Common Rain Garden Problems and Solutions
| Problem | Likely Cause(s) | Solution |
|---|---|---|
| Water ponds for more than 48 hours after rain | Soil drainage too slow; soil mix compacted over time; clay subgrade blocking drainage; inlet clogged with sediment | Test soil drainage again; stir/aerate soil in bowl with a hand fork; clean inlet; consider adding a perforated underdrain pipe; in extreme cases, replace soil mix |
| Erosion at inlet area | Incoming water velocity too high; not enough rock armoring | Increase rock armor at inlet: add larger rocks (3–5 inch) and extend armoring 18–24 inches from entry point; add more plants at inlet edge to slow water with roots |
| Berm eroding | Berm soil too loose; sparse planting; storm flow overtopping berm | Dense-plant the berm immediately; add erosion-control blanket (coir or jute mat) temporarily until plants establish; check that overflow is functioning so berm isn't being overtopped regularly |
| Plants dying in Zone 1 (wet center) | Plants not flood-tolerant enough; drainage too slow causing oxygen depletion | Replace with true wet-tolerant plants (Buttonbush, Blue Flag Iris, Cardinal Flower, Soft Rush, Swamp Milkweed); ensure drainage is occurring within 48 hours |
| Plants dying on berm | Drought stress; berm soil too thin; wrong plants for dry conditions | Plant only true drought-tolerant natives on berm; ensure berm soil is at least 8–12 inches deep; mulch berm heavily; edge berm from adjacent lawn to prevent grass intrusion |
| Mosquitoes breeding in garden | Water not draining within 48 hours — the primary cause; note that properly draining rain gardens do NOT produce significant mosquito populations | Resolve drainage issue; if drainage is working (under 48 hours) mosquitoes are not a concern; if drainage cannot be improved, use Bacillus thuringiensis israelensis (Bti) dunks as interim control |
| Weeds overwhelming the garden | Insufficient mulch; gaps in planting; inadequate Year 1 weeding | Pull weeds before they set seed; add fresh mulch to 3 inches; add more native plants to fill gaps; dense native plantings will outcompete weeds naturally once established |
| Sediment clogging soil over time | Normal long-term accumulation; especially common with driveway or construction site runoff | Remove and replace top 2–3 inches of inlet area soil every 5 years; consider adding a sediment forebay (small gravel-filled depression before the main garden) to trap sediment and simplify maintenance |
| Invasive plants taking over | Common invasive species spreading from surrounding landscape (purple loosestrife, reed canary grass, Phragmites) | Hand-pull small infestations immediately; for established invasives, targeted herbicide by a licensed professional may be necessary; consult local extension for region-specific invasive control guidance |
Permits, Regulations & Resources
Rain garden construction is one of the most homeowner-friendly environmental improvements you can make — in most jurisdictions, no permits are required for a basic residential rain garden. However, some situations do trigger permit requirements, and some localities have specific stormwater regulations that affect how and where you can build.
When You May Need a Permit
- •Grading or earthwork exceeding a defined volume: Most localities require grading permits for projects moving more than 50–200 cubic yards; a typical residential rain garden moves far less, but large projects on sloped sites may trigger this threshold.
- •Projects in or near regulated waterways: Any work within the floodplain, wetland buffer zone, or within a set distance of a stream or river may require permits from state and local environmental agencies; setbacks range from 25 to 300 feet depending on jurisdiction.
- •Projects near septic systems: Most states require permits for any work within a defined distance of a septic drain field; always check before digging near any septic components.
- •HOA restrictions: Homeowners' associations may have landscape requirements affecting rain garden installation; check your HOA documents before beginning; many HOAs have become more rain-garden-friendly and some now actively promote them.
- •Projects receiving grant funding: If you receive government or utility grant funds, the grant program will typically specify any permit requirements as conditions of the funding.
Finding Local Help, Incentives, and Expertise
| Resource | What They Offer | How to Find Them |
|---|---|---|
| State Cooperative Extension Services | Native plant advice, soil condition guidance, local rain garden best practices; many publish free state-specific rain garden guides | Find your local office at extension.org |
| State Environmental / DNR Agencies | Stormwater programs with rain garden guidance, design standards, and sometimes financial incentives | Search "[your state] rain garden stormwater guide PDF" for downloadable resources |
| Local Water Utilities | Rebates for rain garden installation ($50–500+); free design consultations; free plant giveaways; free soil testing | Check your utility's website or call their environmental programs division |
| NRCS (Natural Resources Conservation Service) | Technical assistance and sometimes cost-sharing for practices that improve water quality on private land | Find your local office at nrcs.usda.gov |
| Native Plant Societies | Lists of local native plant nurseries, plant sales, local expertise on which plants perform best in your specific conditions | Search "[your state] native plant society" — most states have at least one, and most major cities have local chapters |
| Regional Stormwater Programs | Resources and incentives for areas draining to sensitive water bodies (Chesapeake Bay, Puget Sound, Great Lakes, Gulf of Mexico) | Chesapeake Bay Program is particularly well-developed with financing and technical assistance |
| City and County Programs | Homeowner resources developed under the EPA's MS4 program | Cities like Portland OR, Minneapolis MN, Philadelphia PA, Austin TX, and Seattle WA have outstanding homeowner resources |
Essential national online resources: EPA Stormwater (epa.gov/nps/urban-runoff-low-impact-development); Lady Bird Johnson Wildflower Center Native Plant Database at wildflower.org (find natives by state and condition); USDA PLANTS Database at plants.usda.gov; NOAA Rainfall Atlas at hdsc.nws.noaa.gov (find design storm rainfall data for your exact location); iNaturalist at inaturalist.org (identify plants and record observations).
Quick Reference & The Bigger Picture
Rain Garden Planning Checklist
| Phase | Task | Notes |
|---|---|---|
| Planning | Identify primary contributing drainage area and measure square footage | Walk your yard during rain; measure roof sections, driveway, and sloped lawn areas that will feed the garden |
| Planning | Call 811 to locate buried utilities before any digging | Free; legally required in most states; allow 2–3 business days for utility marking |
| Planning | Check local permit requirements and HOA rules | Call local municipality planning/zoning office; check HOA documents |
| Planning | Research available incentives and rebates | Search "[your city/county/state] rain garden rebate" and contact local water utility |
| Planning | Decide on DIY vs. professional involvement; establish budget | Review cost tables in Section 7; factor in any rebates; decide which phases to DIY vs. hire out |
| Site Selection | Mark all setback zones: 10+ ft from house, 25 ft from septic tank, 50+ ft from well | Draw to scale on graph paper or use Google Maps measurement feature |
| Site Selection | Confirm sun exposure at proposed site (6+ hours preferred) | Observe over 1–2 days; shaded sites limit plant palette significantly |
| Site Selection | Identify overflow path and confirm it drains safely | Walk the path where overflow will go; ensure it leads to lawn, street, or safe discharge point |
| Site Selection | Plan your water source connection method | Flex pipe? Buried PVC? Rain chain? Bioswale? Dry creek bed? Decide before building |
| Site Assessment | Conduct infiltration test (perc test) at proposed location | Two-step perc test; target 0.5+ in/hr; test in multiple spots for variable soil sites |
| Site Assessment | Determine native soil type and choose sizing factor (20–60%) | Match soil type to sizing factor table in the Siting & Sizing section |
| Design | Calculate rain garden size in square feet | Drainage area (sq ft) × sizing factor = rain garden area |
| Design | Sketch the shape and mark inlet, overflow, and zone boundaries | Kidney, teardrop, or crescent shapes preferred; mark water source connection path |
| Design | Select native plants for each zone (wet, transitional, dry/berm) | Use regional plant tables; consult local native plant society |
| Design | Plan for seasonal interest sequence and plant groupings in masses | Consider the view from inside; plan groups of 3–7 of each species |
| Materials | Calculate and order soil mix components | Standard mix: 50–60% coarse sand, 20–30% compost, 15–25% topsoil |
| Materials | Obtain plants from local native plant nursery or native plant society sale | Prioritize locally sourced ecotypes; buying in plugs or bare-root reduces cost 50–75% |
| Materials | Obtain shredded hardwood mulch (not bark chips; not rubber mulch) | 2–3 inch layer; 1 cubic yard per 100 sq ft; municipal wood chip programs often free |
| Materials | Obtain inlet armoring rock (river rock or cobble, 2–4 inch size) | Sufficient for 18–24 inch wide armored inlet area; additional for dry creek bed if planned |
| Construction | Strip turf and excavate bowl to design depth | Keep bottom level; save excavated soil for berm construction |
| Construction | Build and compact berm on downslope side (if slope requires) | Compact in 4-inch layers; berm top 6–8 inches above grade; 3:1 side slopes |
| Construction | Fill with rain garden soil mix; install rock-armored inlet and overflow | Surface 4–6 inches below berm top when complete; overflow level sets maximum water level |
| Connection | Install downspout connection and test before planting | Flex pipe, buried PVC, or rain chain; run a hose test to confirm flow direction |
| Planting | Plant Zone 1 (wet) → Zone 2 (transitional) → Zone 3 (berm/dry) | Zone 1: iris, rush, swamp milkweed; Zone 2: coneflower, aster, switchgrass; Zone 3: little bluestem, baptisia |
| Planting | Apply 2–3 inch shredded hardwood mulch over all bare soil | Keep mulch away from plant crowns; do not mulch steep berm faces |
| Establishment | Water new plantings every 3–5 days for first 8–12 weeks | Native plants are drought-tolerant once established — not before |
| Establishment | Weed weekly for first growing season | Pull before seed set; ID native seedlings before weeding |
| Ongoing | Cut back dead stems in late winter/early spring (not fall) | Leave standing through winter for wildlife habitat and beauty |
| Ongoing | Inspect and clear inlet/overflow after major storms | Annual essential task; check for erosion, blockages, berm stability |
| Integration | Consider adding rain barrel at same downspout | Captures first-flush runoff for irrigation; overflow routes to rain garden |
The Bigger Picture: Your Rain Garden's Impact
A rain garden is a small feature with a remarkably large reach. A single 300 square foot rain garden capturing runoff from 1,000 square feet of roof can infiltrate tens of thousands of gallons of stormwater per year — water that would otherwise carry pollutants into a storm drain, contribute to a downstream flooding event, or erode a nearby stream bank.
Multiply that effect across a neighborhood. Across a city. A rain garden on every lot that has one changes the hydrology of a watershed — reducing peak flows, improving water quality, recharging aquifers, and supporting the native plant communities that anchor local ecosystems. These effects are measurable and documented in every city where rain garden programs have been deployed at scale.
And at the most immediate scale — your yard — a rain garden is simply a beautiful, purposeful thing. A garden that earns its place not just aesthetically but functionally, contributing to the health of the water systems around it every time it rains. Native plants finding their place in a landscape that has largely abandoned them. A patch of habitat where monarch butterflies fuel their migration, where native bees find pollen that keeps them alive, where birds find seeds and shelter through winter.
Every drop that soaks in rather than runs off is a small victory for the watershed. Build one. Then tell your neighbors why. The best rain gardens are the ones that inspire the next one down the street. Call 811. Test your soil. Plant something native. Let it rain.